Sighting in a New Rifle Leave a reply
Sight in that Rifle!
By Jason Brooks
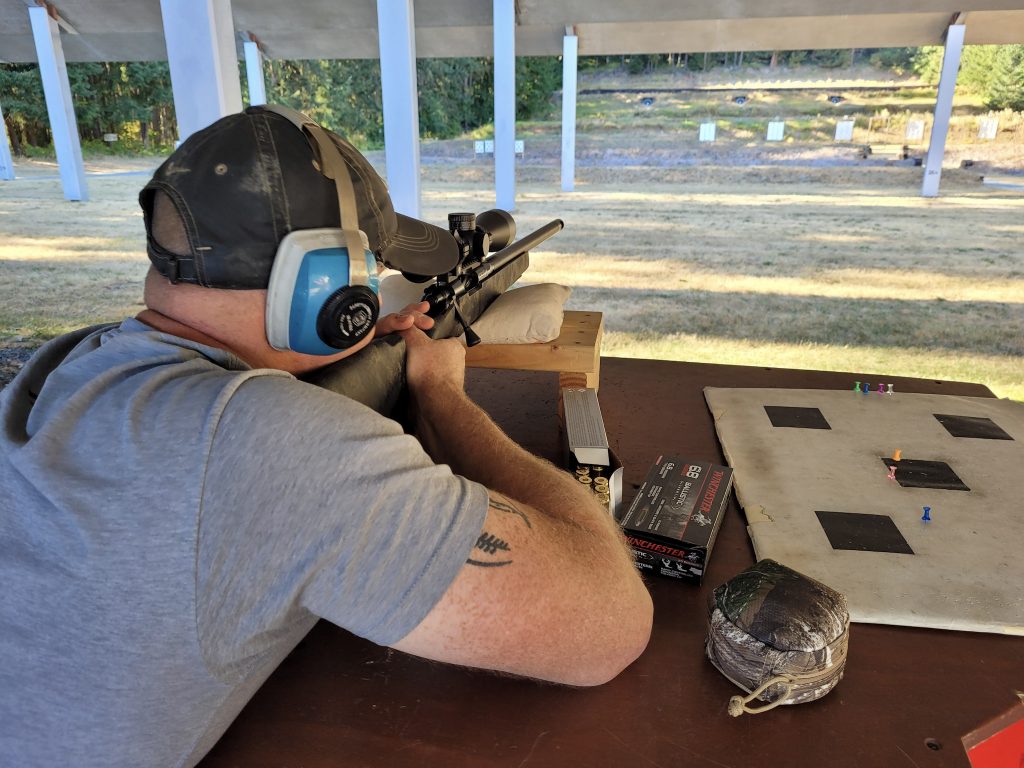
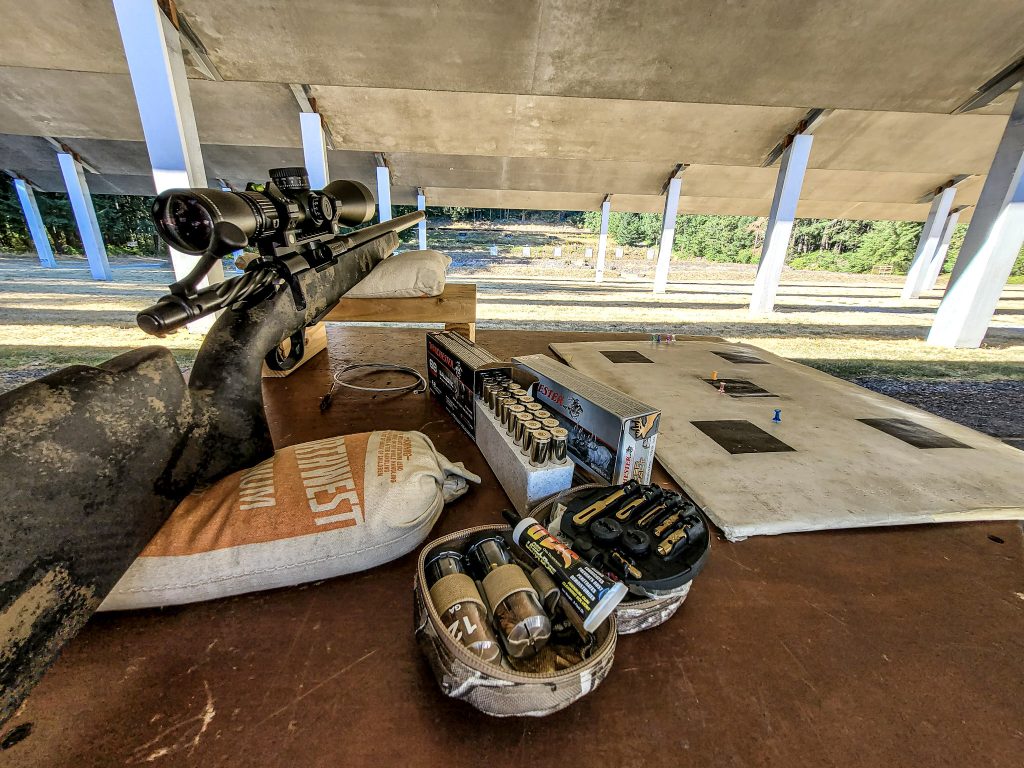
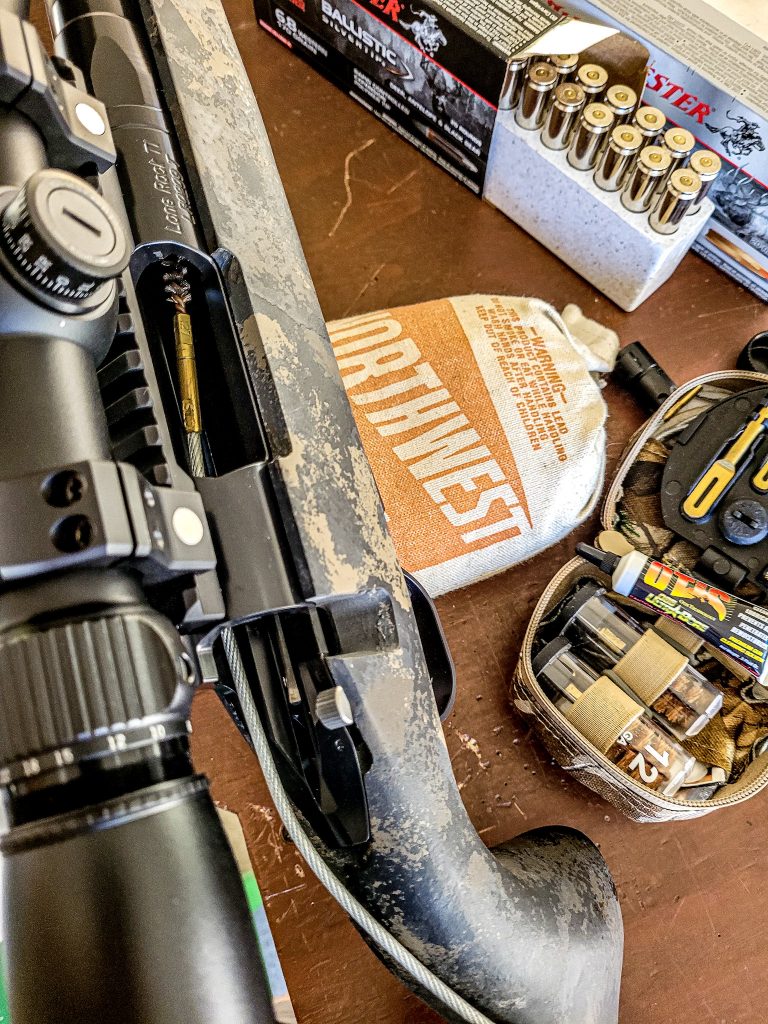
September is upon us and for the rifle hunter that means it is time to hit the rifle range. For some it might be to check the zero and make sure their trusty deer rifle is still sighted in, while for others it might be to “break in” a new gun. The latter occurred for me this year after getting the phone call from Sportco a few weeks ago that I have been waiting for, my new Oregon Mountain Rifle Company Lonerock Ti had arrived.
So, what does it mean to “break in” a rifle?
Barrel break-in is a bit controversial at the rifle range. Ask ten shooters how to break-in a barrel and you will likely get ten different answers. Luckily OMR sends instructions that are recommendations for their barrels but it really is up to the shooter. The idea is that a new barrel which has the lands and grooves reamed out will have some burrs and nicks in it. After all it is a metal cutting process and even with tight tolerances of a custom rifle such as the Lonerock Ti nothing is perfect.
The standard break-in process is to shoot the rifle and clean it after each shot for the first few shots, then shoot a couple of rounds between cleaning until you put a dozen or more rounds through it. Again, each person has their own idea of how to do this process. While I was at the shooting bench Lee Freeman, owner and gunmaker for OMR, called me after I sent him a quick text that I was at the range with the rifle he made. I asked him what was the most import part of breaking in the barrel and his reply was simple: “The main thing is to not over heat the barrel as you don’t want to temper it, and a hot barrel becomes a soft barrel as the metal heats up and softens as well as expands”. Of course when the barrel cools it will be different and shoot different, so taking Lee’s advice I didn’t let the barrel get too hot between shots. This might be why it is recommended to clean it after each shot for the first several shots. It is more of a process to slow the shooter down and let that barrel stay cold. It will also clean out any debris or metal that might shave off with the first few shots since the lands are gripping the bullet tightly.
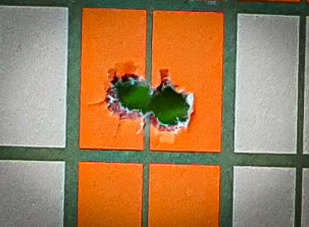
Lee added that after about 30 to 40 rounds the rifle will shoot slightly faster with an increase in velocity as the pressure will become consistent. You will also start to see consistent grouping around this time as well. When he told me this I let him know that my first three shot group out of the new barrel was less than a 1/2-inch. He wasn’t surprised as OMR has a very tight quality control on their barrels.
If you have a new rifle you can subscribe to the barrel break-in process if you wish, for me, I didn’t do the entire break-in process. Before you bash me on this I will explain, the groups were so tight that I didn’t feel the need to waste ammunition. This rifle is a hunting rifle, in fact one I will be taking on an Idaho mule deer and elk hunt next month, as well as an Idaho whitetail hunt in November. If the shots were sub-MOA already why keep shooting it at $70 per box?

Learn the Scope
When it comes to sighting in a rifle keep in mind your intended use of the rifle. For most a 1-inch group at 100 yards is more than adequate. Of course we all want to shoot sub-one inch groups but unless you handload and are shooting a custom or modified rifle this might not be a reality. Instead learn your equipment. The rifle I was sighting in was topped with a Vortex Razor HD LHT 4.5-22×50 FFP and chambered in 6.8 Western. The scope would out-shoot me, and what I mean by that is it was created for long distance and precision shooting. I don’t do either but learning the features of the scope made it much easier to sight in the rifle.
First, the FFP stands for “First Focal Plane” which means the reticle will increase with the power magnification so it is always “true”. When a scope doesn’t have this then the lines in the scope will mean different distances depending on what zoom or power you have set on the scope. With FFP the lines remain true for holdover. To add to this the scope also has raised locking turrets with a “RevStop Zero” system. This means you can sight in the rifle and then re-set the scope dials to zero. Each “click” is a ¼ MOA so if you range the target at a far distance and know the MOA needed you can quickly move the turrets to that MOA and simply pull the trigger. This is a quick and basic explanation as MOA is worth its own blog. For those “old school” shooters, simply put it does away with the need to use “Kentucky Windage”.
Learn the Rifle.
After learning how to use the scope is was time to learn how to shoot the rifle. Most hunters think shooting is just aiming and pulling the trigger but it is much more than that. Learn how to use your rifle. This means knowing everything about the rifle including how to work the bolt handle. Rob Endsley and Joey Pyburn have been using the Browning X-Bolt and if you have ever shot a Browning then you know they have a unique 60-degree bolt lift. This means you only need to lift the bolt handle 60-degrees to open the action. The OMR Lonerock Ti safety is similar to the Remington model 700 with a safety tang that is a post you push forward or pull back on. A Winchester and Ruger might have the Mauser style three position lever, while Browning and Savage often use a slide on the back of the action. Each make and model can be different and you want to learn and practice at the range because once you have that buck or bull in the sights the last thing you want to do is fiddle with the safety.
Triggers are also unique. Some are adjustable while others are not. I own a few Kimber rifles and must say they are triggers that are easy to adjust in both poundage and travel. The OMR Lonerock TI trigger is light and has no travel which is what I prefer. Some shooters like to feel the pulling of the trigger, or have a longer travel, so they know they are in the process of firing the rifle. Either way it should almost be a surprise when the rifle goes off and you don’t want a trigger that is so hard to pull that you move the rifle while trying to fire it.
Other things to learn are how to load the rifle, which can vary from type of action to even an internal magazine well or an external box magazine. Working the bolt to load a round into the action and even ejecting a round or spent case is important to know.
Sight it in.
Finally, after all of that it is time to sight in the rifle. For those that have had a new scope put on or a new rifle and scope combination the best way to save on ammo is to first bore sight it. There are a few tools on the market that help with bore sighting including lasers but one way to do it is to simply set it on a rest with the bolt removed. Have a target at 25 yards and center the target in the barrel while looking down it. With the rifle on the rest look through the scope to see if the crosshairs are close to the center of the target, it needed make an adjustment.
There are some theories on sighting in a rifle with 3 shots, but in reality you will likely shoot way more than this. It is a good idea to take a shot at 25 yards and see where you are hitting and make adjustments at this range first. If you are three inches off at 25 yards then you will likely be 12 inches off at 100 yards and that could mean missing the target altogether and won’t know how far to adjust the scope. Once you are within an inch at 25 yards it is time to move out to 100 yards.
Keep in mind that grouping shots is different than sighting in and you should do this before you finalize the sight in process. Each rifle shoots ammo differently and it is recommended you shoot different brands and bullet styles until you find one that groups well. To do this you aim at the exact same point and shoot three to five rounds, making sure to let the barrel cool between shots (again, think back to Lee Freeman’s advice and never shoot a barrel until hot, as it can have adverse effects). If you make adjustments to the crosshairs after each shot you will never know how the ammo groups. The idea is to find a brand and bullet that shoots a tight group and then sight in the rifle knowing it is hitting in the same spot each time.

Point Blank Range or Precise Aimpoint
Depending on if you plan on using the MOA system or just aim and shoot out to point blank range you will need to sight in the scope accordingly. For use of MOA systems where you will adjust the dial on the scope to the needed MOA for the known distance then sight in for either 100 or 200 yards depending on the MOA scale you compute out. If you don’t know what this means, well, then it is likely you shoot “point blank range”. This is the most common system used by hunters and often sight in the rifle to shoot “dead on” at 200 yards. This might mean 1 ½ to 2-inches high at 100 yards. Depending on what caliber and bullet you are shooting, along with game pursuing, this can mean hitting a deer sized kill zone at 300 yards or more without needing to hold over the animal. Just put the crosshairs behind the shoulder and squeeze.
As you can see there is a lot to sighting in a rifle. But once you have the rifle properly sighted in it will make the process much easier each time you head to the range. If you use the same ammo and don’t change out the scope then it can be as simple as checking to make sure it still hits the bullseye, of course practice is needed but that is for another blog.
Jason Brooks
The Outdoor Line Field Editor