D.I.Y. European Skull Mount Leave a reply
The first time I decided to do a European skull mount it was a long and very stinky process. It was so disgusting that I vowed to never do another one on my own. Yuk!
You can send your mount to a beetle shop that immerses the head in a box full of meat-eating beetles that devour every ounce of meat, tissue, and cartilage off the skull in a very short amount of time. It’s a great option but you’ve got to either ship the head or have a shop within driving range of your home. Not a good option for me.
The following process is how I went about making my most recent skull mount of a beautiful Montana mule deer. All in all I had about two full hours into this process and the final product will look excellent on the wall of my office.
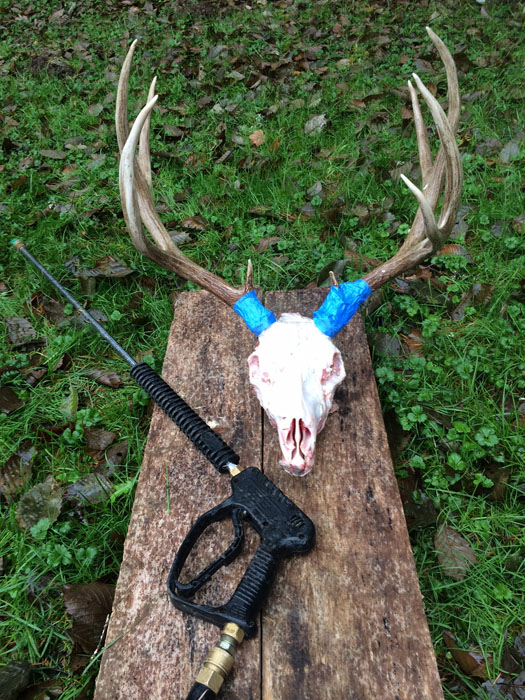
First I cleaned the skull with a pressure washer much like Mark Kayser does in the video below. I’ve been a fan of Mark’s since his days hosting a hunting show for Truck Vault and I followed his video to a “T” to get my deer skull fully cleaned.
I used a big Honda 9 horsepower pressure washer to clean the skull to my liking. This took about 45 minutes and it helps to have very high pressure for this process. You’ll want to tape the base of the antlers to keep from removing the coloring away from the antlers in that area with the pressure.
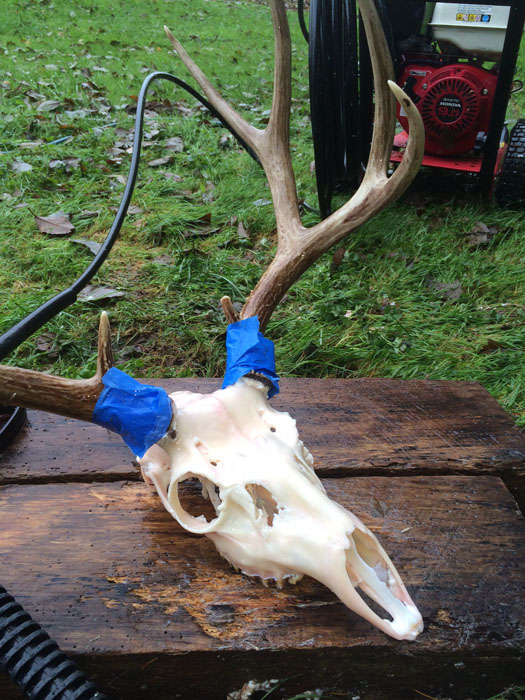
 The skull mount after pressure washing. Ready for step 2!
 Next I brought a large pot of soapy water to a boil and immersed the head into it. Drop the temperature down on the water and simmer the skull in the soapy water for around an hour. This brings out any grease that is left in the skull and helps eliminate discoloring later.
This is when things get kinda weird in this whole process. Head to the nearest beauty supply store and pick up an 8 ounce bottle of Salon Care Volume 40 Developer Creme and a packet of Salon Care “Quick White” powder lightener. The lady at the beauty supply store asked me what I was using it for and since the whole place was packed with ladies I simply answered, “Uh…I’m working on a little project.” You can probably get away with 4 ounces of this stuff, but I went with 8 to be on the safe side.
Mix the two ingredients together in a bowl and then use a brush to completely cover the entire skull in paste. It doesn’t exactly smell great so it’s best to do this outside in a ventilated area. Get as much paste into every corner of the skull as you can.
After your done with this wrap the skull in plastic stretch wrap and place it in front of a space heater. Rotate the skull a couple of times in an hour period. Pull off the wrap and rinse the skull in warm water to get off all the bleaching goop. If the skull doesn’t whiten up to your liking hit it with another coat of goop and go thru this process again.
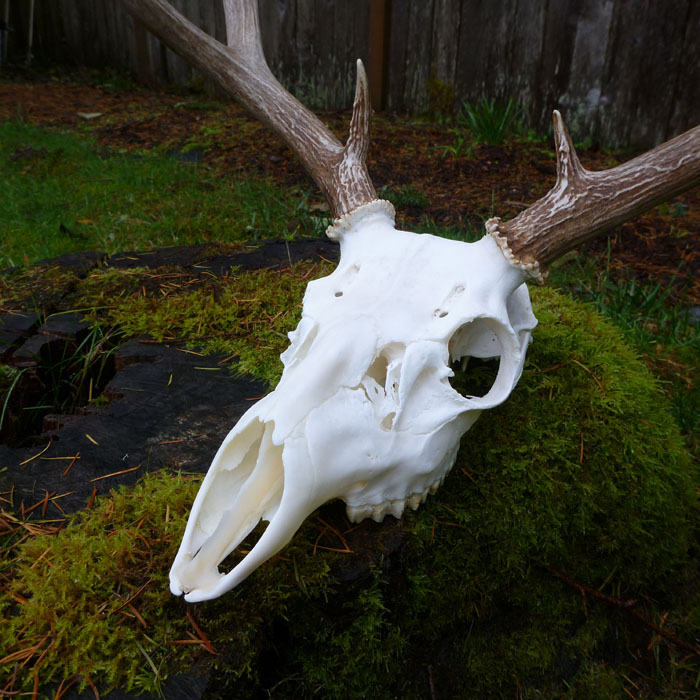
I performed this final process twice and the skull turned a nice, crisp white.
Two notes of caution when doing this. First you want to make sure you wrap the bottom of the antlers with tape during the pressure washing process or you’ll blast off the staining on the base of the antlers. Also be very careful not to get any bleaching compound on the base of the antlers or it’ll effect the stain on the antlers, as well.
Now that I’m done preparing my European mount I just need to build a custom wooden base to hold the mount. I’m thinking a hardwood with a dark finish would work great to accent the skull.
If you really want to get fancy with the final product, however, you could ship your skull mount off to Jana Waller at Painted Skulls. She does some amazing artwork with skulls!
Rob Endsley
The Outdoor Line
710 ESPN Seattle